
How to Make a Video Home Inventory for Insurance
Create a video home inventory for insurance purposes with clear, practical steps to document your belongings and protect your claim after a disaster.
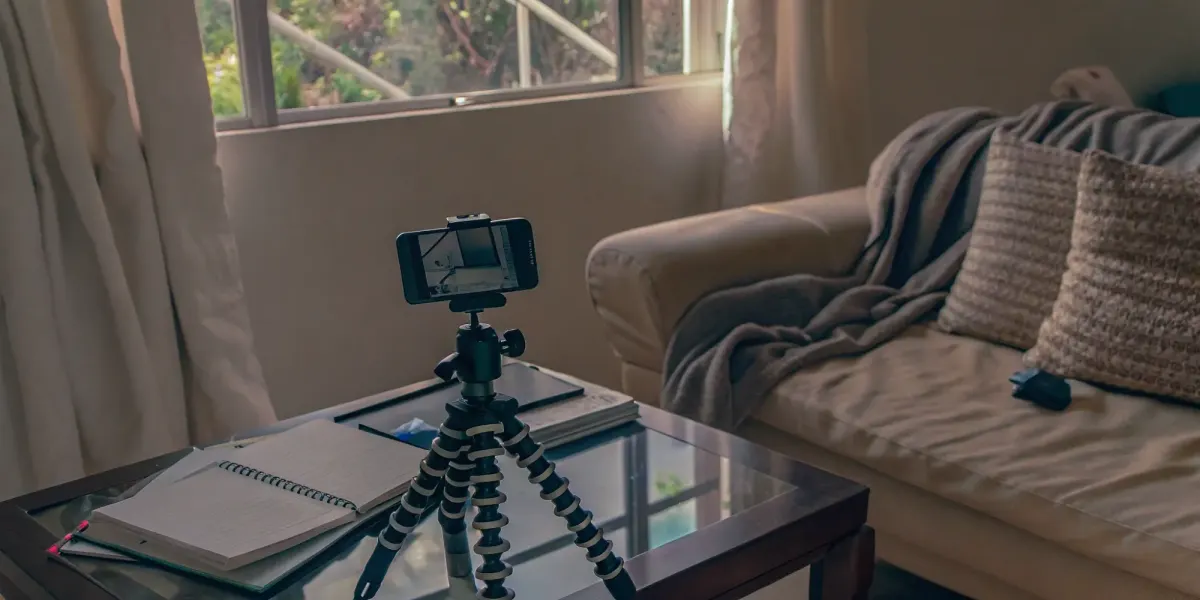
Living in a wildfire-prone area can feel like you're constantly reacting to threats beyond your control, from evacuation warnings to insurance non-renewal letters. But there are powerful, proactive steps you can take right now to protect your financial future. Creating a video home inventory for insurance purposes is one of the most important. This isn't just about listing your stuff; it's about taking control of your recovery before a disaster strikes. It’s your personal proof of ownership, a tool that ensures you can accurately document your losses and demand a fair settlement. This guide will walk you through creating a comprehensive video that serves as your financial lifeline.
Pay Less for Home Insurance
and Avoid Non-Renewal?
Our partner, Five Bays Insurance Agency, offers a free policy checkup that spots hidden discounts to make sure you’re not paying more than you should.
Key Takeaways
- Capture the Details That Maximize Your Claim: Go beyond a simple walkthrough by narrating purchase details, zooming in on serial numbers, and filming appraisals for valuables. This specific evidence is what ensures you receive a fast and fair settlement from your insurer.
- Film with a Clear Plan, Not Perfection: You don't need special equipment—your smartphone is perfect for the job. Move slowly and methodically through each room, using good lighting and a steady hand to create a clear record that eliminates any guesswork for your insurance adjuster.
- Protect Your Inventory and Keep It Updated: A video inventory is useless if it’s lost in the same disaster as your home. Save your files to a cloud service for off-site access and review your inventory annually to add new purchases, ensuring it always reflects the true value of your belongings.
What Is a Video Home Inventory (and Why It’s Your Insurance Lifeline)
After a disaster, trying to remember every single item you owned is an overwhelming, if not impossible, task. A video home inventory is simply a visual record of your personal belongings and the condition they were in. Think of it as your personal proof of ownership, created to make the insurance claim process smoother and more accurate should you ever need to file one. For homeowners in wildfire-prone areas, where the risk of a total loss is real, this isn't just a helpful tip—it's a critical piece of your financial recovery plan.
Why Video Beats a Written List Every Time
A written list is a start, but it often falls short. It’s difficult to capture the specific details and condition of your belongings in writing, and it’s easy to forget smaller items. A video, on the other hand, provides undeniable visual proof. As you walk through your home, your camera captures everything from the brand of your television to the collection of books on your shelf. This visual record is far more powerful and comprehensive than a simple list, helping you recall possessions you would have otherwise forgotten in the stressful aftermath of a loss.
How a Video Inventory Can Speed Up Your Insurance Claim
Filing an insurance claim after a fire is an emotionally draining process. A video inventory removes the heavy burden of trying to recall every lost item from memory. It provides your insurance adjuster with clear, time-stamped evidence of your possessions, which can significantly streamline the claims process. Instead of spending weeks trying to create a list from scratch, you have a detailed record ready to go. This helps you accurately complete your proof of loss forms and substantiates the value of your claim, leading to a faster, more fair settlement.
A Critical Tool for Homeowners in Wildfire Zones
For those of us living with wildfire risk, a home inventory is non-negotiable. When a wildfire destroys a home, it often leaves nothing behind. Your video inventory becomes the primary tool for rebuilding your life and ensuring you receive the full value of your policy. It also serves another vital purpose: helping you verify your insurance coverage is adequate before a disaster strikes. By documenting your belongings, you can better assess whether your current policy limits are high enough to replace everything you own, giving you a chance to make adjustments while you still can.
How to Create Your Video Home Inventory: A Step-by-Step Guide
Creating a video inventory might sound like a big project, but it’s a straightforward process that gives you powerful protection. Following a clear plan helps you create a comprehensive record of your belongings, which is essential for a smooth insurance claim. A detailed inventory is a core part of any solid household preparedness strategy, just like having a Wildfire Action Plan ready to go when you need it most. Breaking the task down into these simple steps makes it manageable and ensures you don’t miss a thing.
Gather Your Gear: What You'll Need to Start
You don’t need professional equipment to create a useful home inventory video. Your smartphone is the most important tool for the job, as its video quality is more than enough to capture the details your insurer will need. To make the process even more effective, consider asking a friend or family member to help. While you film, they can take additional still photos of important items, giving you another layer of documentation. When it comes to proving what you own, more evidence is always better.
Map Out Your Filming Strategy
Before you press record, take a few minutes to plan your approach. A great first step is to contact your insurance agent. They can often provide specific tips on what they need to see for a claim. Many insurers also offer a home inventory checklist to guide you, and some even have their own apps designed to help you organize your inventory. Once you have that guidance, map out a path through your home. Deciding on a route beforehand helps ensure you cover every area without backtracking or accidentally missing an important space.
Your Room-by-Room Filming Plan
The key to a thorough inventory is to be systematic. Start at your front door and move through your home one room at a time, filming each room completely before moving to the next. Make sure to open every closet, cabinet, and drawer to document the contents inside. Don’t forget the less-obvious spaces that often hold valuable items. Be sure to include hallways, the attic, basement, and garage. Finally, take your camera outside to record items in your yard, on your patio or porch, and in any sheds or outbuildings.
Simple Tips for Clear, High-Quality Video
Your video is only useful if the contents are clear and easy to see. Before you start, tidy up each room to make sure your belongings aren't obscured by clutter. Good lighting is also critical. Turn on all the lights and open the curtains to let in as much natural light as possible. For dark corners, closets, or basements, use a flashlight to illuminate the space. As you film, move slowly and hold your phone as steady as you can. This helps avoid blurry footage that could make it difficult to identify items later.
What to Capture: The Details That Matter Most
A great video inventory is more than a quick scan of your rooms. It’s a detailed, undeniable record of what you own and what it’s worth. After a wildfire or other disaster, you won’t be able to rely on memory alone, especially when you’re under stress. The details you capture now are the proof you’ll need to file a complete and accurate claim, ensuring you get the full compensation you’re entitled to. A thorough video can significantly speed up the process and prevent frustrating back-and-forth arguments with your insurance adjuster over the value of your property.
Think of yourself as a detective creating a case file for your home. Every piece of evidence matters. This doesn’t mean you need to spend weeks on the project, but it does mean being strategic. Focus on capturing the specific information that insurers require to process a claim efficiently. From the serial number on your television to the appraisal for a family heirloom, these details are what transform your video from a simple home movie into a powerful financial tool. It’s your best defense against being underpaid on a claim, which is a real risk when you're trying to rebuild your life. We’ll walk through exactly what to focus on so you can be confident your inventory will stand up when you need it most.
The Essentials: Serial Numbers, Models, and Purchase Info
For electronics, appliances, and other major purchases, the specific details are everything. As you film, zoom in on the labels or tags on the back or bottom of these items. Your goal is to clearly capture the make, model, and serial number. This information is non-negotiable, as it allows your insurer to find the exact replacement value. While filming, it’s helpful to state this information out loud. For each key item, try to note when and where you bought it and how much it cost. Having digital or paper receipts is ideal, so film those too if you have them.
Documenting Jewelry, Art, and Other Valuables
This is one area where homeowners often find themselves underinsured. Your standard policy has coverage limits for high-value items like jewelry, art, firearms, and collectibles. To get the full value for these expensive possessions, you often need to add them separately to your policy through a process called "scheduling" or getting an insurance endorsement. Film these items individually and up close, capturing any unique markings. If you have professional appraisals or certificates of authenticity, lay them next to the item and film them together. This provides clear proof of value that is difficult for an insurer to dispute.
Narrate as You Go: How to Describe Your Items
Your voice is one of the most valuable tools you have while creating your inventory. Don't just film in silence; provide a running commentary. As you record, talk about the items in the frame. Mention what they are, when you bought them, how much they cost, and their general condition. For example, you could say, “This is our living room sofa, purchased from Crate & Barrel in 2021 for about $3,000. It’s in excellent condition with no stains or tears.” This narration adds a rich layer of context that the video alone can’t provide and makes your adjuster’s job much easier.
Identifying Items That Need Special Insurance Coverage
Your completed video inventory is the perfect tool for a check-in with your insurance agent. Once you’ve documented your valuables, it’s time to have a conversation. Always ask your agent if you need extra coverage for very valuable items, as your standard homeowners policy might not cover them fully. You can even offer to share clips of your inventory to ensure your coverage is aligned with what you actually own. Taking this proactive step now can protect you from discovering you’re underinsured after it’s already too late. It’s a simple conversation that can save you thousands of dollars.
Common Mistakes to Avoid When Filming Your Inventory
Creating a video inventory is a huge step toward protecting your financial future, but a few common mistakes can undermine your efforts. A poorly made video can create delays and disputes during an already stressful claims process. The goal is to create a clear, detailed, and undeniable record of your property. By avoiding these simple errors, you ensure your video serves its purpose: to help you recover quickly and completely after a disaster. Think of this as your visual proof—the stronger it is, the smoother your path to recovery will be. Taking a little extra time now to get it right can save you significant headaches and money later.
Don't Let These Errors Delay Your Claim
A home inventory is your most powerful tool when you need to file an insurance claim. After a catastrophic event like a wildfire, trying to remember every single item you owned is nearly impossible. A video provides a visual record that a written list alone can't match, helping you account for everything from furniture to the contents of your kitchen drawers. But if that video is incomplete or unclear, it can raise questions from your insurance adjuster, leading to frustrating back-and-forth conversations and potential delays in payment. Your video should eliminate ambiguity, not create it. A clear, comprehensive inventory helps your adjuster process your claim efficiently, getting you the funds you need to start rebuilding your life.
The Problem with Blurry or Unstable Video
If your insurer can’t clearly see an item in your video, it might as well not be there. Shaky, dark, or out-of-focus footage makes it difficult to identify your belongings and assess their condition and value. To avoid this, film slowly and deliberately. Before you start in each room, turn on all the lights and open the blinds to maximize natural light. For dark corners, closets, or basements, use a flashlight or the light on a second phone to illuminate the space. Brace your phone or camera with both hands to keep it steady. Taking a few extra seconds to ensure each shot is stable and well-lit is one of the most important things you can do to create a useful inventory.
Why Missing Details Can Cost You
A video of your belongings is a great start, but the details are what determine your settlement. For major items like electronics, appliances, and furniture, you need to capture more than just a quick visual. As you film, pause to get clear shots of serial numbers, model numbers, and brand names. It’s also critical to have a corresponding document that lists when and where you bought an item and its original cost. This information is essential for establishing the item’s value. Without these specifics, an insurer may assign a lower, generic value to your property, which could leave you with a smaller settlement than you deserve. Understanding the difference between replacement cost and actual cash value is key to ensuring your policy covers what you truly need.
The Risk of an Outdated Inventory
Your home isn't static, and neither is your inventory. It’s easy to create a video and then forget about it, but an outdated inventory can leave you underinsured. If you buy a new sofa, upgrade your television, or invest in expensive new tools for your garage, those items won't be covered if they aren't documented. Get into the habit of updating your inventory after any significant purchase. A quick addendum video or even just adding the receipt to your inventory folder can make a huge difference. At a minimum, plan to do a quick review of your video and documentation once a year to add new items and remove things you no longer own. Keeping your inventory current ensures it accurately reflects the full value of what you stand to lose.
How to Safely Store and Organize Your Video Files
Creating your video inventory is a huge step, but where you keep it is just as important. A video file saved only on your home computer won’t help you if that computer is lost in a fire. The goal is to make your inventory accessible and secure, no matter what happens. Proper storage and organization ensure that when you need this crucial file, it’s safe, sound, and ready to help you start the recovery process without delay.
Protect Your Files with Cloud Storage and Backups
The key to protecting your video inventory is redundancy. You should always keep multiple copies of your files. A good rule of thumb is to save your video in at least two different places, with one of them being off-site. The easiest way to do this is by using a cloud storage service like Google Drive, iCloud, or Dropbox. These services automatically sync your files online, keeping them safe from physical damage to your home or devices. You can also save a copy to an external hard drive as a secondary backup. Having both a cloud and a physical backup gives you an extra layer of security.
Organize for a Stress-Free Claim Process
When you’re filing a claim, you’ll be under enough stress. A well-organized inventory can make the process much smoother. Start by giving your video files clear, descriptive names, like Kitchen_Inventory_June2024.mp4 or Master_Bedroom_Closet.mov. If you have multiple videos, create folders for each room. You might also create a simple document that lists each video file and highlights the most valuable items documented within it. This acts as a table of contents, helping you and your insurance adjuster quickly find proof of specific belongings without having to scrub through hours of footage. This small step now can save you a massive headache later.
Why You Need an Off-Site Copy
Think about the worst-case scenario: a wildfire destroys your home. If your only copy of the inventory—whether it’s on a laptop or a thumb drive—was inside the house, it’s gone too. This is why having an off-site copy is non-negotiable. Cloud storage is the most straightforward off-site solution. Other options include emailing the files to yourself, keeping an external hard drive in a safe deposit box at your bank, or leaving a copy with a trusted friend or family member who lives in a different area. The location doesn't matter as much as the fact that it's physically separate from your property.
Helpful Tools and Apps to Keep You Organized
If managing video files and spreadsheets feels daunting, several apps can streamline the process for you. The National Association of Insurance Commissioners (NAIC) offers a free app called MyHome ScrAPPbook for both iPhone and Android. It’s designed specifically for creating a home inventory. The app lets you build your inventory room by room, taking photos or videos of your items and adding details like purchase dates, values, and serial numbers directly within the app. It keeps everything neatly organized and creates a backup you can easily export, simplifying the entire process from start to finish.
How Often Should You Update Your Inventory?
Creating a video home inventory is a huge step toward protecting your financial future, but it’s not a one-and-done task. Think of it as a living document that needs to accurately reflect what you own. An outdated inventory can be just as risky as having no inventory at all, potentially leaving you underinsured when you need coverage the most. To ensure your video serves its purpose during a claim, you need a simple, consistent schedule for keeping it current. The key is to make updates a routine part of managing your home, not a major project you dread. By following a few straightforward guidelines, you can maintain an accurate record without feeling overwhelmed.
Update After Big Purchases or Renovations
Did you just finish a kitchen remodel, buy a new living room set, or invest in an expensive piece of art? It’s time for a quick inventory update. For any significant new purchase, you should update your inventory right away. Don’t wait for your annual review. Simply take a few minutes to film the new items, capturing brand names, model numbers, and serial numbers. Narrate the date of purchase and the price you paid. This immediate update ensures your most valuable new assets are documented. If a disaster were to strike before your next scheduled review, you’ll have the proof you need to file a complete claim for these recent additions.
Plan for a Quick Annual Review
At a minimum, you should review and update your home inventory at least once a year. A great time to do this is when you receive your home insurance renewal notice. As you review your policy, you can also review your inventory to make sure your coverage still aligns with your possessions. During your annual review, walk through your home with your camera and note any changes. You can either film a brand-new video or create a short addendum video that documents new items, things you’ve sold or discarded, and any changes in condition. This yearly check-in helps you maintain an accurate record and ensures your insurance policy remains relevant to your current lifestyle.
Keep Your Inventory in Sync with Your Insurance Policy
Your video inventory is a powerful tool, but it works best when your insurance agent knows what’s in it. Whenever you acquire new valuables, tell your insurance company so they can confirm you’re fully covered. Standard policies often have coverage limits for specific categories like jewelry, firearms, or fine art. You should always ask your agent if you need extra coverage, often called a “rider” or “floater,” for these high-value items. Keeping your insurer in the loop prevents gaps in your coverage. A complete inventory is the first step, but ensuring your policy reflects that inventory is what truly secures your assets. Managing these details is a core part of a holistic wildfire action plan.
Related Articles
Pay Less for Home Insurance
and Avoid Non-Renewal?
Our partner, Five Bays Insurance Agency, offers a free policy checkup that spots hidden discounts to make sure you’re not paying more than you should.
Frequently Asked Questions
What if I don't have receipts for most of my older belongings? That’s perfectly fine and very common. While receipts are helpful, the main purpose of the video is to provide clear visual proof of ownership. Your video, especially when you capture brand names, model numbers, and the overall condition of your items, is powerful evidence on its own. Your narration also adds important context, so be sure to mention when and where you roughly acquired an item. The goal is to provide as much information as you can to build a strong and accurate picture of what you owned.
Does my video need to be professionally shot or edited? Absolutely not. Your insurance adjuster isn't looking for a polished film. They need clear, steady footage that accurately documents your property. In fact, a simple, unedited video can feel more authentic. Focus on good lighting and moving slowly so the items are easy to identify. A series of shorter clips, perhaps one for each room, is often easier to manage and review than one single, long recording.
How can I be sure my insurance company will actually use this video? Insurance companies require you to provide a "proof of loss," which is essentially a detailed list of everything you need replaced. A video inventory is one of the most effective ways to create that list and substantiate your claim. It provides undeniable evidence that helps the adjuster verify your possessions, which can speed up the entire process. It removes the guesswork for both you and your insurer, leading to a more accurate and often faster settlement.
I have a lot of stuff. How do I keep the video from becoming overwhelmingly long? The key is to be strategic. You don't need to spend five minutes on your collection of coffee mugs. For general items, a slow, steady pan across the room or shelf is enough to show the quantity and type of belongings. Reserve your close-ups and detailed narration for more valuable items like electronics, furniture, appliances, tools, and anything that would be particularly expensive or difficult to replace.
Is it better to take a video or just a lot of photos? A video is generally more effective because it captures the context of your home and proves ownership of many items in a short amount of time. However, the best approach is to use both. Use your video for a comprehensive room-by-room walkthrough. Then, supplement it with clear, high-quality still photos of your most valuable possessions, making sure to get sharp images of serial numbers, unique markings on jewelry, and any accompanying appraisals or receipts.