The Best Zone 1 Plants for Extreme Climates
Find the best zone 1 plants for extreme climates. Get practical tips on hardy perennials, native species, and resilient gardening for cold regions.
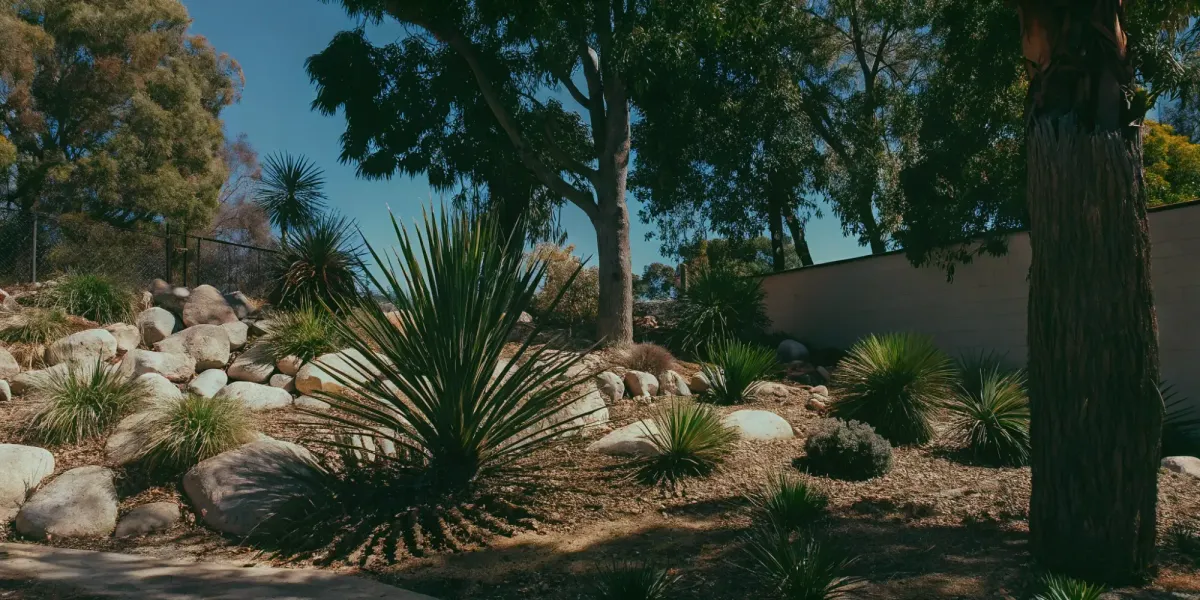
For homeowners in high-risk fire areas, the search for affordable insurance can feel hopeless. Non-renewal notices and soaring premiums leave you feeling powerless. But there are concrete actions you can take to lower your risk and make your property more insurable. It starts with Zone 1, the critical five-foot buffer around your home. This small area is your first and best line of defense against embers. Creating a fire-safe Zone 1 is one of the most powerful steps you can take to protect your investment and your family. We’ll explain exactly what insurers are looking for, from non-combustible materials to the careful selection of zone 1 plants, giving you a clear roadmap to a safer, more resilient home.
Pay Less for Home Insurance
and Avoid Non-Renewal?
Our partner, Five Bays Insurance Agency, offers a free policy checkup that spots hidden discounts to make sure you’re not paying more than you should.
Key Takeaways
- Establish a Non-Combustible Zone: The most effective action you can take is creating a five-foot, ember-resistant barrier around your home's perimeter. Use materials like gravel, pavers, or concrete to ensure that if an ember lands near your foundation, it has nothing to ignite.
- Clear All Flammable Fuel from Zone 1: This five-foot space must be completely free of anything that can burn. This means routinely clearing leaves and pine needles from gutters and under decks, and moving firewood, flammable furniture, and even doormats at least 30 feet away from the house.
- Practice Fire-Smart Landscaping: You can still have plants near your home if you do it safely. Use non-combustible containers like stone or terracotta on patios and decks, and choose well-irrigated, fire-resistant plants that are meticulously maintained to prevent them from becoming a fire risk.
What is Zone 1?
When we talk about protecting your home from wildfire, the most critical area isn’t miles away in the forest—it’s the first few feet right outside your door. This area is known as Zone 1, or the Ember-Resistant Zone. It is the non-combustible space extending five feet out from the base of your house, including any attached decks or patios. Think of it as a protective bubble. Its entire purpose is to prevent wind-blown embers from landing on flammable materials and igniting your home. Embers are the leading cause of homes burning down during a wildfire, and a well-maintained Zone 1 is your single best defense against them.
Creating this defensible space is a core principle of home hardening and is often required by insurers. According to CAL FIRE guidelines, this zone is non-negotiable for home survival. It’s not about clearing every plant from your property; it’s about creating a strategic, fire-resistant barrier where it matters most. By focusing your efforts here, you can dramatically reduce the chance that your home will catch fire, even if a wildfire is nearby. Taking these steps is one of the most empowering things you can do to safeguard your family and property.
What Defines Zone 1 Conditions
Zone 1 is defined by the absence of anything that can easily burn. Your goal is to create a clean, non-combustible perimeter. This means using materials like gravel, pavers, or concrete for walkways and patios right up against the house. Remove all dead leaves, pine needles, and dry grass from this area, including from under decks and in gutters.
This is also the place to move flammable objects. Firewood piles, wicker patio furniture, combustible doormats, and stored items should be relocated at least 30 feet away from the house. The idea is simple: if an ember lands in Zone 1, it should have nothing to ignite. This makes your home a much harder target during a wildfire.
Temperature Ranges and Growing Season Limits
The "temperature range" that matters in Zone 1 is the intense radiant heat from a wildfire, which can be hot enough to ignite siding or break windows. A clean, non-combustible Zone 1 acts as a buffer, keeping flames and extreme heat away from the structure itself. By removing fuel, you prevent a fire from burning right up against your home.
This directly impacts your "growing season limits." In this five-foot zone, plant growth should be severely restricted. Avoid woody shrubs, bark mulch, and any vegetation that becomes dry and flammable during fire season. If you must have plants, they should be carefully selected for fire resistance, well-irrigated, and meticulously maintained. The limit here is a hard one: nothing that can carry a flame to your house is allowed.
Common Climate Challenges
Homeowners in fire-prone areas face a unique set of climate challenges: long periods of drought, low humidity, and strong winds. These are the conditions that turn a small spark into a major disaster. Zone 1 is your direct response to these challenges. A non-combustible perimeter is your best defense when winds are whipping embers through the air, as it gives them nowhere to land and ignite.
During a drought, when vegetation is tinder-dry, a clean Zone 1 ensures there is no fuel source connected to your home. It’s a practical, actionable way to adapt your property to the climate realities you face. By addressing this critical space, you take control and build resilience, making your home safer no matter the weather. You can start building your own comprehensive safety strategy with a Wildfire Action Plan.
What Plants Grow in Zone 1?
Gardening in Zone 1 means selecting plants that can withstand some of the most extreme cold on the planet. With winter temperatures dropping to -50°F, the key is choosing vegetation that is exceptionally resilient. The short growing season also means you need plants that can complete their life cycle quickly. While the options are more limited than in warmer climates, you can still create a beautiful and productive garden by focusing on plants that are genetically programmed to thrive in these tough conditions. The right selections will not only survive but will add color and life to your landscape year after year.
Hardy Native Perennials
Perennials are the foundation of a low-maintenance Zone 1 garden because they come back every year. Many plants tough enough for this zone are also surprisingly good at handling dry conditions. Look for native perennials that have adapted over centuries to the local climate and soil. Options like Siberian Iris, Arctic Poppy, and certain types of Penstemon and Primrose can provide reliable color. These plants have deep root systems that help them endure both the freezing winters and the short, intense summers. Choosing hardy perennials means less work for you and a more resilient garden overall.
Cold-Resistant Trees and Shrubs
Trees and shrubs form the backbone of your landscape, providing structure and year-round interest. In Zone 1, this means choosing species known for their incredible cold tolerance. Paper Birch, Quaking Aspen, and Balsam Poplar are deciduous trees that can handle the deep freeze. For evergreens, consider Black Spruce or Tamarack. When it comes to shrubs, options like Dwarf Arctic Birch, certain varieties of willow, and Bog Rosemary are excellent choices. These woody plants are built to survive long, harsh winters and provide essential habitat for local wildlife, contributing to a healthier surrounding environment.
Short-Season Vegetables and Annuals
Growing vegetables in Zone 1 requires a bit of strategy. Because the growing season is so short, you’ll need to focus on fast-maturing crops. Leafy greens like spinach, kale, and lettuce, along with root vegetables like radishes and turnips, are great candidates. For many vegetables and annual flowers, you'll need to start seeds indoors several weeks before the last frost to give them a necessary head start. This simple step can make the difference between a successful harvest and disappointment, allowing you to maximize the brief window of summer warmth.
Why Choose Native Plants?
Opting for native plants is one of the smartest decisions you can make for any garden, especially in an extreme climate. Native plants are perfectly adapted to your region’s specific soil and weather, meaning they require less water, fertilizer, and overall maintenance once established. More importantly, they are a critical part of a healthy local ecosystem. They support food webs for pollinators and wildlife in ways that non-native plants simply cannot. By landscaping with natives, you are not just planting a garden; you are helping to restore a balanced, sustainable, and resilient environment right outside your door.
How to Succeed at Zone 1 Gardening
Gardening in Zone 1 presents unique challenges, from extreme cold to a brief growing season. But success isn’t about fighting the climate—it’s about working with it. By using smart strategies and choosing the right plants, you can create a garden that is not only beautiful but also resilient. These techniques will help you make the most of your short season and build a landscape that thrives where others might struggle. It all starts with giving your plants the best possible foundation.
Prepare and Amend Your Soil
Healthy plants start with healthy soil. Before you plant anything, it’s worth getting to know your soil’s composition. You can use a simple home test kit or send a sample to a local cooperative extension for a detailed analysis. Most Zone 1 soils benefit from adding rich organic matter, like compost, which improves drainage, adds nutrients, and helps retain moisture. This is also where choosing the right plants makes a difference. Native plants are already adapted to your region's soil and climate, making them a sustainable, low-maintenance choice for your garden. Healthy, well-hydrated soil supports vigorous plants that are naturally more resilient to stress.
Start Seeds Indoors to Extend the Season
With such a short window between frosts, getting a head start is essential. As experts from Proven Winners note, "Because the growing season is so short, it's a good idea to start vegetable and annual flower seeds inside your home." By starting seeds indoors 6 to 8 weeks before your last expected frost date, you can have strong, healthy seedlings ready to transplant as soon as the weather allows. All you need is a sunny windowsill or a simple grow light setup, seed-starting trays, and a quality potting mix. This proactive step gives you more control over your garden’s success and significantly lengthens your potential harvest time.
Know When and Where to Plant
Timing is everything in a Zone 1 garden. Planting too early can expose tender seedlings to a late frost, while planting too late means you might run out of time before winter returns. Your local frost dates are the most important dates on your calendar. You can find accurate frost dates for your specific area in The Old Farmer's Almanac each year. Beyond timing, consider where you plant. A spot near a south-facing wall will be warmer and more protected than an exposed northern slope. Thoughtful placement not only protects plants from the elements but is also a key principle of creating a fire-safe landscape around your home.
Use Mulch for Protection and Soil Health
Mulch is a Zone 1 gardener’s best friend. A thick layer of mulch insulates the soil, conserves precious moisture, and suppresses weeds. As Homes and Gardens explains, you can "put mulch around plants to help keep the ground from freezing too deeply," which protects the root systems from extreme cold. However, the type of mulch you choose matters, especially in fire-prone areas. While wood chips and straw are great insulators, they are also flammable. Within the first five feet of your home, it’s critical to use non-combustible options like gravel or decorative rock. Further out, well-composted wood chips can be a safer choice than highly flammable materials like pine straw.
How to Protect Plants from Weather and Wildlife
A thriving garden in a challenging climate isn’t just beautiful—it’s also more resilient. Healthy, well-maintained plants are better equipped to handle stressors like extreme heat and drought, which makes them less susceptible to fire. Protecting your landscape from the elements is a key part of creating a property that is both beautiful and defensible. It’s not about creating a barren moonscape around your home; it’s about smart, proactive care that reduces risk.
By focusing on the health of your plants, you’re taking a critical step in your overall wildfire preparedness strategy. Simple actions like proper watering, mulching, and strategic placement can make a huge difference in how your landscape holds up to harsh conditions. These efforts help ensure your plants remain a vibrant asset to your property, not a liability. A well-tended garden is your first line of defense, creating a less inviting path for wildfire. You can get a personalized checklist of actions for your property by starting your free Wildfire Action Plan.
Protect from Frost and Winter Weather
In areas prone to high heat and low rainfall, protecting your plants is all about conserving moisture and regulating soil temperature. One of the best ways to do this is to use a thick layer of mulch to protect their roots. Mulch acts as a shield, slowing evaporation from the soil surface and keeping roots cooler during intense heat waves. For the area within five feet of your home, it's crucial to choose a non-combustible mulch like gravel or composted wood chips. This simple step helps keep your plants hydrated and healthy while creating a critical, ember-resistant zone right next to your foundation. Paired with a deep, infrequent watering schedule that encourages strong root growth, mulching gives your plants the foundation they need to survive tough conditions.
Find Sheltered Spots to Block Wind
Strong, dry winds can quickly dehydrate plants and carry embers long distances. You can protect your landscape by planting in a sheltered spot away from strong winds, but it’s also about creating strategic windbreaks. Use the landscape to your advantage by placing larger, well-irrigated, fire-resistant shrubs and trees in locations where they can disrupt wind patterns and potentially block embers from reaching your home. However, it's vital to keep these larger plantings outside of your immediate defensible space zone—at least 30 feet from your house. Proper spacing and maintenance, like trimming lower branches, are essential to ensure these plants don't become a fire ladder that could carry flames to your roof.
Deter Wildlife with Fencing and Other Tactics
Wildlife can be another source of stress on your landscape. Deer, rabbits, and other animals can damage or destroy plants, leaving behind dead, dry vegetation that can easily become fuel for a fire. Protecting your garden from wildlife is an important part of maintaining a fire-safe property. You can use fencing to keep them out of your garden, especially for vegetable patches or more delicate plants. Many fire-resistant native plants are also naturally deer-resistant, offering a dual benefit. By selecting the right plants and protecting them from damage, you ensure your landscape stays healthy, green, and less flammable, contributing to the overall safety of your home.
Use Containers for More Flexibility
Container gardening is an excellent strategy for adding beauty to your home’s exterior without increasing your fire risk. This approach is perfect for patios, decks, and the critical 0-to-5-foot zone around your foundation, where it’s essential to avoid combustible materials. By growing plants in containers, you can easily manage their health and placement. Choose non-combustible pots like terracotta, stone, or metal, and fill them with well-maintained, irrigated plants. This allows you to enjoy vibrant flowers and greenery right next to your home in a fire-smart way. It’s a simple, flexible solution that gives you complete control, making it easy to create a beautiful and safe space.
How to Create Microclimates and Extend Your Season
Gardening in Zone 1 means working with a very short growing season. The key to success is learning how to create microclimates—small pockets in your yard where the conditions are slightly warmer and more protected than the surrounding area. By strategically using your landscape and a few simple tools, you can effectively stretch your season, giving your plants the extra time they need to thrive. These techniques can make the difference between a sparse garden and a surprisingly productive one.
Choose a Site for Maximum Sun
One of the easiest ways to create a warmer microclimate is by using the existing structures on your property. A south-facing wall of your house, garage, or even a stone fence will absorb the sun's heat during the day and radiate it back out at night. This can keep the surrounding soil and air several degrees warmer, essentially creating a friendlier growing zone. Plants placed near a house wall might get enough extra warmth and shelter to act like they are in Zone 3. Take note of these sunny, sheltered spots and use them for plants that need a little extra help, like tomatoes or tender perennials.
Use Structures and Protective Covers
Protective structures are a Zone 1 gardener's best friend. You can use hoop houses or low tunnels in the spring to warm the soil and start growing vegetables and annuals weeks earlier than you could in the open. These don't have to be complicated or expensive; a simple frame covered in plastic sheeting works wonders. For unexpected late frosts that threaten new growth, keep frost cloth, old blankets, or even bedsheets handy to cover vulnerable plants overnight. These simple barriers trap ground heat and can easily save your garden from a sudden cold snap.
Try Container Gardening
If you want maximum flexibility, try growing plants in containers. Container gardening allows you to move your plants to follow the sun, shelter them from harsh winds, or bring them indoors when a hard frost is on its way. This method is perfect for growing herbs, salad greens, and even some fruiting plants that wouldn't otherwise survive the short season. Choose larger pots, as they provide better insulation for the roots against temperature swings. For very heavy containers, placing them on wheeled platforms makes moving them around much easier.
Use Natural Season Extension Techniques
Because the Zone 1 growing season is so brief, giving your plants a head start is essential. The most effective way to do this is to start seeds indoors about six to eight weeks before your last expected frost date. This allows seedlings to develop strong root systems in a controlled environment. When you transplant them outside after the danger of frost has passed, they will be ready to take off and will have a much better chance of maturing and producing before the fall cold sets in. All you need is a sunny windowsill or a simple set of grow lights to get started.
How to Care for Your Garden Season by Season
Gardening in Zone 1 is a unique challenge that requires careful planning and attention to the distinct needs of each season. The extremely short growing window and harsh conditions mean that timing is everything. By aligning your garden tasks with the seasons, you can create a thriving landscape that withstands the cold and comes back strong year after year. Here’s a breakdown of how to care for your garden from the first thaw of spring to the deep freeze of winter.
Prepare in the Spring
Spring in Zone 1 is brief, so you need to act fast. The key is to get a head start on the short growing season. Many successful gardeners start seeds indoors several weeks before the last expected frost. This gives tender vegetables and annuals a chance to mature before the cold returns. Once the ground has thawed, clear away any remaining winter mulch and debris to allow the soil to warm up in the sun. This is also the perfect time to amend your soil with compost or other organic matter, giving your plants the nutrients they need for a strong start.
Maintain Through the Summer
Summer is the season of growth, but it can still present challenges like dry spells and strong winds. Choose plants that are tough enough to handle these conditions. Consistent watering is crucial, especially for new plantings, but be mindful not to overdo it. A layer of mulch made from straw, wood chips, or grass clippings is your best friend during the summer. It helps the soil retain precious moisture, keeps weeds at bay, and regulates soil temperature. Regularly check your plants for pests or signs of stress so you can address any issues quickly and keep your garden healthy and productive.
Get Ready for Winter in the Fall
As summer fades, your focus should shift to preparing your garden for the long, cold winter. Knowing your area's first frost dates is essential for timing your final harvests and fall preparations. After the first hard frost, it’s time to protect your perennial plants. The most important step is applying a thick layer of mulch around the base of your plants after the ground has frozen. This insulates the roots not from the cold itself, but from the damaging freeze-thaw cycles that can heave plants out of the ground. Prune any dead or diseased branches and clean up fallen leaves to prevent pests and diseases from overwintering.
Why Native Plants are Key to a Sustainable Garden
Choosing native plants is one of the most effective decisions you can make for a garden in an extreme climate. These plants have spent thousands of years adapting to the local soil, rainfall patterns, and temperature swings. Unlike ornamental species that might struggle, native plants are built for resilience. They create a self-sufficient, low-maintenance landscape that works with your environment, not against it. This approach saves you time and resources while building a healthier, more stable ecosystem right outside your door.
Support Biodiversity and Ecosystems
Native plants are the foundation of a healthy local ecosystem because they evolved alongside local wildlife. They provide the right food at the right time for birds, insects, and pollinators. As one expert notes, "Native plants are an important part of a healthy local ecosystem primarily because they support food webs in ways that introduced plants do not." When you plant native species, you’re not just adding a plant to your yard; you’re restoring a piece of a complex natural web. This creates a more balanced and resilient environment, where beneficial insects can thrive and help manage pests naturally, reducing the need for chemical interventions.
Conserve Water and Reduce Maintenance
In dry or extreme climates, water is a precious resource. Native plants are the clear winner for water conservation. Having adapted to local rainfall, "these hardy species have developed sophisticated root systems and water-storage mechanisms that allow them to thrive on natural precipitation alone." Their deep roots can access moisture far below the surface, where many non-native plants can't reach. This means less time spent watering and lower water bills. Because they are perfectly suited to the local climate, they also require less fussing—no special fertilizers or constant attention needed. They are the ultimate low-maintenance choice for a beautiful, sustainable garden.
Improve Soil and Prevent Erosion
The deep, fibrous root systems of native plants do more than just find water; they are essential for building healthy soil. These roots create channels that improve water absorption and reduce runoff, which is critical for preventing erosion on slopes. Over time, they contribute organic matter to the soil, improving its structure and fertility. As these plants have "co-evolved with local soils, climate patterns, and wildlife," they are uniquely equipped to enhance the ground they grow in. A landscape with healthy, stable soil is better able to withstand both drought and heavy rainfall, making your entire property more resilient.
Support Local Wildlife and Pollinators
Planting native species is one of the best ways to support local pollinators like bees, butterflies, and hummingbirds. These plants provide the specific nectar and pollen sources that local wildlife depends on for survival. Beyond the pollinators we can see, native plants also foster a thriving world beneath the surface. Research shows that "native plant gardens support more microbial diversity and higher relative abundance of potentially beneficial taxa compared to adjacent turf grass lawns." This rich soil life is the engine of a healthy garden, helping plants access nutrients and resist disease, creating a vibrant and self-sustaining landscape.
How to Plan Your Zone 1 Garden for Long-Term Success
A successful Zone 1 garden isn’t about fighting the climate—it’s about working with it. Planning for the long term means creating a landscape that can handle temperature swings, unpredictable precipitation, and a short growing season without constant intervention. By making smart choices from the start, you can build a garden that is not only beautiful but also resilient and largely self-sustaining. This approach focuses on creating a healthy, stable ecosystem right in your yard, which is the foundation for any garden that needs to withstand harsh conditions. It’s about setting yourself up for success so you can spend more time enjoying your space and less time worrying about its survival.
This strategic approach moves beyond just picking pretty flowers; it involves understanding the unique challenges of your environment and selecting plants and techniques that are inherently suited to overcome them. A well-planned garden becomes an asset to your property, improving soil health, managing water runoff, and supporting local wildlife. For homeowners in high-risk areas, a resilient garden is also a key component of a defensible space, using smart landscaping to reduce wildfire fuel. The goal is to create a system that works in harmony with nature, rather than in opposition to it. This mindset shift is crucial for anyone looking to cultivate a lasting and low-maintenance outdoor space in a demanding climate. The following steps will guide you through the core principles of choosing the right plants, managing water effectively, and maintaining your garden throughout the year for lasting success.
Choose Plants Built for a Harsh Climate
The single best thing you can do for your garden is to choose plants that are already adapted to your local environment. Native plants are your strongest allies here. They have evolved over thousands of years to thrive in your region's specific soil, temperature, and precipitation patterns. Because they are genetically suited to the area, they are naturally resilient to the challenges of a Zone 1 climate. By restoring native plant communities, you also rebuild critical habitats for local pollinators and wildlife, creating a balanced ecosystem that supports itself. Choosing plants that belong here means less work for you and a healthier, more vibrant garden.
Manage Water in Extreme Conditions
Water is a precious resource, especially in climates with unpredictable weather. Native plants are masters of water management. Many have developed deep, sophisticated root systems and water-storage mechanisms that allow them to thrive on natural rainfall alone, making them perfect for areas prone to drought. Their inherent tolerance for both heavy rains and dry spells helps keep your garden stable without needing constant supplemental irrigation. This natural drought resistance not only conserves water but also makes your garden more resilient. You can build a lush landscape that won’t wither during a dry spell or require a massive water bill to maintain.
Plan for Year-Round Care
A thriving garden is a year-round project that contributes to a healthy local ecosystem. Native plants are essential because they support food webs in ways that non-native species simply can't, offering food and shelter for local wildlife throughout the seasons. Planning for year-round care means thinking about what your garden provides in the spring, summer, fall, and even winter. This includes clearing away dead debris in the fall to reduce fire risk and ensuring your soil is protected with mulch over the winter. By landscaping with native species, you create a garden that remains a vibrant and resilient part of the natural environment all year long.
Related Articles
Pay Less for Home Insurance
and Avoid Non-Renewal?
Our partner, Five Bays Insurance Agency, offers a free policy checkup that spots hidden discounts to make sure you’re not paying more than you should.
Frequently Asked Questions
Does creating a non-combustible Zone 1 mean my yard has to be just dirt and concrete? Not at all. While the goal is to eliminate flammable materials, you can still have a beautiful landscape. Think of it as a design choice. Use materials like gravel, pavers, or decorative rock to create clean, attractive walkways and patios right against your home. This creates the necessary fire-resistant barrier without making your yard look barren. The key is to choose materials that won't ignite from embers.
What are the most common mistakes people make in Zone 1? The biggest mistake is overlooking the small things. People often forget about flammable doormats, wicker furniture pushed against the siding, or pine needles collecting under a deck. Another common error is using bark or pine straw mulch right up to the foundation. While great for gardens, these materials are like kindling for embers. Relocating firewood piles and ensuring gutters are clean are also crucial steps that are easy to miss.
My deck is attached to my house. Is that part of Zone 1? Yes, absolutely. You should treat the entire area on, around, and under your deck as part of this critical five-foot zone. Keep the deck surface clear of flammable items like planters with dried-out plants or combustible furniture. Most importantly, make sure the space underneath is completely clear of leaves, weeds, and stored items. Embers can easily blow under a deck and ignite debris, so keeping that area clean is non-negotiable.
Will maintaining Zone 1 actually help with my home insurance? While a specific discount isn't guaranteed everywhere, creating and maintaining a proper Zone 1 is one of the most important signals you can send to an insurer. It shows you are proactively managing your property's wildfire risk. In today's tough insurance market, demonstrating these home hardening efforts can be the deciding factor in whether an insurer will offer or renew your policy. It's a fundamental step in staying insurable.
How often do I need to maintain this five-foot zone? Think of it as part of your regular home maintenance routine. It’s not a one-time project. You should do a thorough sweep at the beginning of fire season to clear out any winter debris. After that, a quick check every few weeks to remove newly fallen leaves or pine needles is a good habit. The goal is to keep it consistently clean and free of fuel, so it’s always ready to do its job.