
7 Essential Fire Resistant Home Improvements
Protect your property with these 7 essential fire resistant home improvements. Learn which upgrades matter most for safety and insurance coverage.
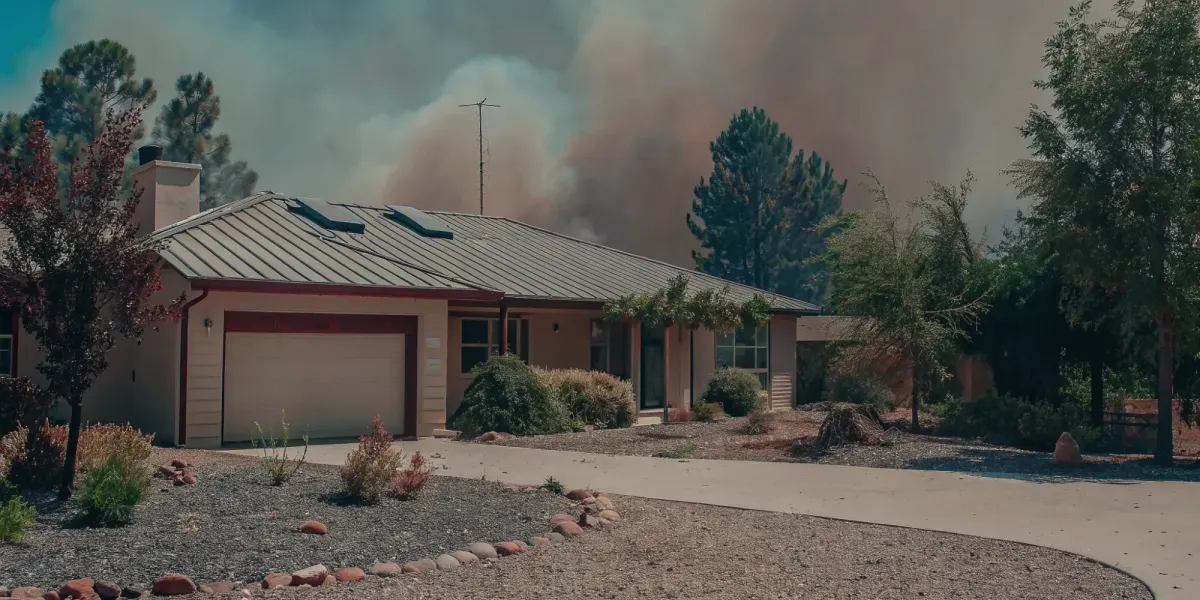
Living in a wildfire-prone area can feel like a constant battle against uncertainty, especially when a non-renewal notice from your insurance company lands in your mailbox. It’s a frustrating and confusing experience that leaves many homeowners feeling powerless. But you have more control than you think. The key is to shift your property from a liability to a lower-risk asset in the eyes of insurers. This guide is designed to give you a clear, actionable path forward. We will focus on the specific, high-impact fire resistant home improvements that matter most to insurance carriers, helping you protect your home and strengthen your case for coverage.
Pay Less for Home Insurance
and Avoid Non-Renewal?
Our partner, Five Bays Insurance Agency, offers a free policy checkup that spots hidden discounts to make sure you’re not paying more than you should.
Key Takeaways
- Build a Dual Defense with Structure and Space: True wildfire resilience comes from combining two key strategies: strengthening your home with fire-resistant materials and creating a buffer zone by actively managing the vegetation around it.
- Focus on High-Impact Upgrades First: To make the biggest difference for your safety and insurability, prioritize the most vulnerable areas. Start with a Class A roof, cover all vents with 1/8-inch metal mesh, and establish a non-combustible 5-foot zone around your foundation.
- Treat Protection as an Ongoing Practice: Home hardening isn't a one-time project. Stay protected by making maintenance a routine, including annual inspections of your roof and siding and seasonal clearing of gutters and flammable debris.
What Are the Most Effective Fire-Resistant Materials?
When it comes to protecting your home from wildfire, the materials you build with are your first line of defense. Home hardening isn't just about clearing brush; it's about strengthening the structure itself against embers and extreme heat. Choosing the right fire-resistant materials is one of the most impactful investments you can make, not only for your safety but also for maintaining your home insurance. Insurers are increasingly looking for tangible proof that homeowners are reducing their risk, and upgrading your home with these materials sends a clear message. Let's walk through the key components that make a home more resilient to fire.
Class A Roofing
Your roof is the most vulnerable part of your home during a wildfire, as it’s a large, flat surface where embers can land and ignite. That's why a Class A fire rating is the highest standard for fire resistance and a non-negotiable for homes in high-risk areas. Materials like metal, slate, or tile meet this standard. Metal roofs are exceptionally durable and often come with long warranties, while tile offers excellent fire resistance. Keep in mind that tile is heavy and may require reinforced roof supports, so it’s important to consult a professional. Upgrading to a Class A roof is a significant project, but it’s also one of the most critical steps you can take to protect your property.
Fire-Resistant Siding and Exteriors
The exterior walls of your home are another critical area for defense. Wind-blown embers can easily ignite flammable siding, allowing fire to breach your home's structure. The goal is to create a non-combustible shell. Materials like stucco, fiber cement, brick, and natural stone are excellent choices because they don't burn. These materials can withstand high heat and direct flame contact far better than traditional wood or vinyl siding. If you're building or remodeling, consider these options to create a hardened exterior. Even small changes, like ensuring no gaps or cracks exist in your current siding, can make a difference in preventing embers from finding a way in.
Hardened Windows and Doors
Windows and doors are often the weakest points in a home's defense against wildfire. Intense heat can cause single-pane glass to shatter, allowing embers and flames to enter your home. Upgrading to double- or triple-glazed windows provides a crucial layer of insulation against heat. Tempered glass is another strong option, as it’s designed to withstand higher temperatures before breaking. Don't forget the frames—metal frames are more resistant than vinyl, which can melt. For your doors, especially those leading outside from your home or garage, installing fire-rated exterior doors is essential for creating a complete barrier against fire.
Non-Combustible Insulation
While you can't see it, the insulation inside your walls plays a role in your home's fire resistance. Standard insulation can be flammable, but non-combustible options can help slow the spread of fire if it gets inside your walls. Fire-resistant cellulose insulation, for example, is treated with fire retardants and can be blown or sprayed into wall cavities. This material not only improves your home's energy efficiency but also adds an important layer of protection. It’s a smart upgrade that contributes to a comprehensive home hardening strategy, helping to protect the structural integrity of your home from the inside out.
How to Prioritize Your Home Hardening Upgrades
When you’re facing a long list of potential home upgrades, it’s easy to feel overwhelmed. The key is to start with the changes that offer the most protection for your investment. Think of your home's exterior as a shield. You want to reinforce the most vulnerable points first—the areas where flying embers are most likely to land and ignite a fire. Your roof, vents, and siding are the first lines of defense.
Prioritizing your projects not only makes the task more manageable but also helps you focus your budget where it counts. Many of these upgrades are exactly what insurance companies look for when they assess a property’s wildfire risk. By focusing on high-impact areas, you’re not just making your home safer; you’re also taking a critical step toward maintaining your insurance coverage. We’ll walk through the most critical upgrades, starting from the top of your house and working our way down.
Upgrade Your Roof and Gutters
Your roof is the single most vulnerable part of your home during a wildfire because it presents a large, flat surface where embers can land and accumulate. If your roof is made of a combustible material like wood shake, replacing it should be your number one priority. The best choices are Class A fire-rated roofing materials like asphalt shingles, metal, or tile, which are designed to withstand severe fire exposure. Metal and tile roofs are especially durable and can last for decades.
Don’t forget your gutters. They are notorious for trapping leaves, pine needles, and other flammable debris. During a wildfire, this dry material can be easily ignited by a single ember. Clean your gutters regularly, especially before fire season begins. For an extra layer of protection, consider installing non-combustible metal gutter guards to prevent debris from building up in the first place.
Strengthen Siding and Exterior Walls
The siding on your home is another critical area that needs to be fire-resistant. Embers can get trapped in small crevices or ignite flammable siding directly, allowing fire to breach your exterior walls. If you have wood siding, ensure it is well-maintained and consider treating it with a fire retardant.
For the highest level of protection, it’s best to use non-combustible or ignition-resistant materials. Materials like stucco, fiber cement siding, brick, and stone are excellent choices because they don’t burn. When upgrading, it’s also important to seal any gaps or cracks where embers could slip through. Taking the time to harden your home’s exterior creates a strong barrier that can make all the difference when a wildfire approaches.
Seal Vents and Openings
It’s a frightening thought, but a home can burn from the inside out. Embers are small and light enough to be carried by the wind through vents and other small openings in your home’s exterior. Once inside your attic or foundation crawl space, they can ignite insulation, wood framing, and stored items. This is why sealing these entry points is such a crucial step.
Go around your house and inspect all attic, foundation, and soffit vents. You can retrofit them by covering the openings with 1/8-inch metal mesh screening. This simple fix is inexpensive but highly effective at blocking embers while still allowing for necessary airflow. Also, be sure to seal any gaps around incoming pipes and electrical wiring to close off every possible entry point for embers.
Protect Your Deck and Foundation
An attached deck can act like a wick, carrying fire directly to your house. If your deck is made of wood, it’s a significant vulnerability. The most important first step is to remove all flammable items from on, around, and under your deck, including furniture, firewood, and dried leaves. This creates a clean space that denies fuel to an approaching fire.
When it’s time to replace your deck, choose ignition-resistant materials like composite decking or pressure-treated wood. You should also create a non-combustible zone around the entire base of your home. This means clearing a five-foot perimeter around your foundation of all flammable vegetation, mulch, and debris. Instead, use materials like gravel or pavers to create a fire-resistant foundation that embers can’t ignite.
How to Create and Maintain Defensible Space
Beyond strengthening your home’s structure, the space around it is your first line of defense. Creating and maintaining defensible space is one of the most effective ways to protect your property from wildfire. This isn’t about clear-cutting your land; it’s about strategically managing vegetation in zones to reduce flammable materials and slow a fire’s spread. Think of it as creating a buffer that makes it harder for flames—and especially wind-blown embers—to reach your house.
Insurance companies pay close attention to defensible space when assessing a property’s risk. A well-maintained yard can be the deciding factor in keeping your coverage or making it more affordable. The work is broken down into three distinct zones, starting from your foundation and moving outward. Following these guidelines from fire safety experts provides a clear roadmap for protecting your home and demonstrating your commitment to risk reduction. Regular maintenance is key, as leaves, needles, and weeds can quickly accumulate and undo your hard work. This ongoing effort shows insurers that you are actively managing your property's wildfire risk, which can be critical in today's challenging insurance market. It's a tangible action you can take to regain a sense of control.
Zone 1: The Ember-Resistant Zone (0-5 feet)
This zone, immediately surrounding your home's foundation, is the most critical. Embers are the primary threat in most wildfires, capable of traveling a mile or more ahead of the fire front and igniting vulnerable spots. Your goal here is to eliminate anything that can catch fire. The National Fire Protection Association (NFPA) advises you to "Remove all flammable materials like dry leaves, mulch, woodpiles, and plants. Use non-flammable materials like gravel or concrete here." Swap out bark mulch for rock, pavers, or decomposed granite. Prune any tree branches that hang over your roof and remove flammable plants or trellises attached to the walls. This non-combustible barrier is essential for preparing homes for wildfire.
Zone 2: The Lean, Clean, and Green Zone (5-30 feet)
In this zone, the focus shifts to interrupting the fire’s path and keeping flames small and on the ground. The landscape should be well-irrigated and meticulously maintained. According to the NFPA, you should "Keep plants spaced apart, trim tree branches, and remove dead plants." Create separation between shrubs and trees to prevent fire from jumping from one to another. Prune the lower branches of mature trees at least 6 to 10 feet from the ground to stop a surface fire from climbing into the canopy. Keep your lawn mowed short and regularly rake up fallen leaves, pine needles, and dead twigs. This creates a landscape that is much less likely to carry a fire toward your home.
Zone 3: The Reduced Fuel Zone (30-100+ feet)
The outermost zone is about reducing the overall fuel available to an approaching wildfire. The objective is to slow the fire and lower its intensity before it reaches the more managed areas closer to your home. Here, the NFPA recommends you "Keep the area tidy, remove dead trees, and thin out dense vegetation." You don’t need to remove all trees, but you should create horizontal space between them. Remove fallen logs, dead branches, and thick underbrush that could act as ladder fuels. By thinning the vegetation in this zone, you disrupt the fire’s momentum, giving firefighters a much better chance to defend your property if needed.
What Do Fire-Resistant Upgrades Actually Cost?
Let's be direct: protecting your home from wildfire is a significant investment. But understanding the costs—and the potential savings—is the first step toward making a smart, actionable plan. Think of these upgrades as an investment not just in your property, but in your family's safety and your ability to stay insured in a challenging market. The price tag can feel intimidating, but breaking it down helps clarify where your money is going and what financial help might be available.
Breaking Down Material and Labor Costs
The price for home hardening varies widely depending on your home’s age, location, and current condition. A complete retrofit to make a home highly fire-resistant can run from $40,000 to $100,000. Even smaller, targeted projects add up; installing fire-resistant gutters, for example, can cost around $15,000. In some cases, homeowners have invested as much as $300,000 to ensure their home is protected. These figures show the serious financial commitment involved in comprehensive wildfire protection, but remember that every step you take reduces your overall risk and makes your property more resilient.
How Upgrades Can Lower Your Insurance Premiums
While the upfront cost is high, these upgrades can positively influence your insurance premiums. It's important to have realistic expectations, as discounts vary by carrier. Some insurers offer modest savings; for example, one major carrier provides a 0.1% discount for certain improvements. However, the savings become more significant with more comprehensive work. Homeowners who complete all of California's recommended wildfire prevention measures could see discounts of up to 10%. The real benefit isn't just a small discount—it's proving to insurers that you are actively reducing your risk, which is key to maintaining your coverage.
Finding Grants and Financial Aid
You don't have to shoulder the entire financial burden alone. Recognizing the high costs, state and local governments are beginning to offer financial assistance. Programs like the California Wildfire Mitigation Program provide grants to help homeowners with the cost of retrofits. It's worth researching what financial aid is available in your specific county or community, as new programs are frequently introduced. These grants can be competitive and often have specific eligibility requirements, but they represent a growing understanding that community-wide safety requires supporting individual homeowners in their efforts to build more resilient properties.
Which Upgrades Give You the Biggest Insurance Benefits?
After investing your time and money into protecting your home, you need to make sure your insurance company recognizes those efforts. While every insurer has its own formula for calculating risk, certain home hardening projects consistently deliver the biggest impact on your policy. Insurers rely on data that shows which upgrades are most effective at preventing a total loss during a wildfire, and they reward homeowners who address those specific vulnerabilities. This isn't just about getting a small discount; for many homeowners in high-risk areas, these upgrades are becoming the baseline requirement for securing coverage at all.
Focusing on the improvements that matter most to insurers not only makes your home safer but also strengthens your case for keeping your policy. It’s about making strategic choices that address the primary ways homes ignite—from wind-blown embers landing on a flammable roof to intense radiant heat shattering a window. By tackling these weak points head-on, you show your insurer that you are a proactive partner in reducing risk. This shifts the conversation from "if" you can get insured to "how" you can work together to protect your property, which is more important than ever when trying to secure affordable coverage.
Home Hardening Projects Insurers Value Most
Insurers prioritize upgrades that address the most common points of failure during a wildfire. At the top of their list is a Class A fire-rated roof. Your roof is the largest, most exposed surface of your home, making it a prime target for embers. Using fire-resistant roofing materials like asphalt shingles, metal, or tile is often non-negotiable for insurability in high-risk areas.
Next is defensible space. Clearing flammable vegetation and debris within the first five feet of your home creates a critical buffer that can stop a ground fire from reaching your house. Finally, insurers look closely at siding and vents. Replacing flammable siding with materials like fiber cement or stucco and covering all vents with 1/8-inch metal mesh helps prevent embers from igniting your walls or entering your attic.
How to Document Your Work for Your Insurer
Simply completing the upgrades isn’t enough; you need to prove it to your insurer. Start by creating a "home hardening file" for your property. This file should contain before-and-after photos of every project, detailed receipts for materials, and invoices from contractors. If your work required permits, include copies of the signed-off permits. This portfolio provides tangible evidence of your investment in risk reduction.
Once your documentation is organized, schedule a call with your insurance agent to review the changes. Don't just mention the upgrades on a renewal form. Send them your file in advance and walk them through the improvements. When you talk to builders and fire safety professionals, ask for written confirmation that the materials meet specific fire-safety standards. This proactive communication shows you’re serious about protecting your property and can make all the difference in maintaining your coverage.
How to Maintain Your Fire-Resistant Home
Installing fire-resistant upgrades is a huge step toward protecting your home, but the work doesn’t stop there. Home hardening is an ongoing commitment, not a one-time project. Over time, materials can wear down, weather can create new vulnerabilities, and vegetation can grow back. Consistent maintenance is essential to ensure your home’s defenses remain effective against embers and flames.
A well-maintained, hardened home is not only safer for your family but also demonstrates to insurers that you are proactively managing your property’s wildfire risk. This can be a critical factor in maintaining your coverage. The following checklists will help you stay on top of the essential tasks required to keep your home resilient year after year.
Your Annual Inspection Checklist
Set aside time each year, preferably before the start of fire season, to walk your property and perform a thorough inspection. This is your chance to catch small issues before they become major vulnerabilities. It’s crucial to regularly check and maintain fireproofing materials to ensure they continue to work well.
Your annual checklist should include:
- Roof: Look for cracked tiles, damaged shingles, or any gaps in the roofing material.
- Vents: Check that all vent screens are intact, without any rips or holes where embers could penetrate.
- Siding: Inspect for cracks, warping, or peeling paint that might expose combustible material underneath.
- Windows and Doors: Examine seals and weatherstripping for any signs of degradation.
Essential Seasonal Maintenance
Some maintenance tasks need to be done more frequently, especially as the seasons change. The most critical seasonal job is clearing flammable debris from around your property. As the National Fire Protection Association advises, you must "keep gutters clear of leaves and pine needles." Clogged gutters provide a perfect fuel bed for flying embers.
Beyond your gutters, focus on maintaining your defensible space. This means removing all flammable materials like dry leaves, dead plants, and woodpiles from the area immediately surrounding your home. Prune tree branches that overhang the roof, and make sure there is no combustible mulch or debris collected against the foundation or under your deck. These simple, recurring actions are some of the most effective ways to reduce your home’s ignition risk.
When to Replace Worn Materials
Fire-resistant materials don’t last forever. Their protective qualities can degrade from exposure to sun, wind, and rain. For example, with certain chemically treated materials, the protective coating can wear away over time. This is why it’s important to understand the expected lifespan of your home’s building materials and plan for their eventual replacement.
Unfortunately, it's often hard to tell just by looking if the protection is still there. Refer to the manufacturer’s guidelines for your roofing, siding, and windows to know when they recommend replacement. Keep a record of when you installed these upgrades so you can track their age. Being proactive about replacing worn components ensures your home remains protected and helps you budget for these essential long-term costs.
Start Building Your Wildfire Action Plan
Taking action is the best way to regain control over your home’s safety and insurability. The good news is that many of the most effective steps are straightforward and can be tackled over time. Home hardening and creating defensible space are the two pillars of wildfire preparedness. These aren't just abstract concepts; they are specific, proven strategies that significantly reduce your home's risk of ignition during a wildfire. Insurers pay close attention to these measures because they work.
By focusing on key vulnerabilities—like your roof, vents, and the area immediately surrounding your foundation—you can systematically lower your risk profile. Each improvement you make adds another layer of protection for your family and your investment. The goal is to create a home that can better withstand embers, which are the primary cause of home ignition during a wildfire. Putting these principles into practice is the most powerful step you can take.
Create Defensible Space
Think of defensible space as a buffer zone between your home and an approaching wildfire. The most critical area is the first five feet from your foundation, often called the Ember-Resistant Zone. Embers can travel a mile or more ahead of a fire, and if they land on flammable material next to your house, your home is in immediate danger. Your goal here is to eliminate anything that can easily catch fire. Swap out bark mulch for gravel or pavers. Move firewood piles at least 30 feet away from the house. The National Fire Protection Association (NFPA) provides detailed guidance on creating these essential safety zones around your property.
Harden Your Home’s Structure
Home hardening involves using building materials and installation techniques that increase your home’s resistance to heat, flames, and embers. Your roof is the most vulnerable part of your house, so starting there makes a huge impact. If you’re replacing your roof, choose Class A fire-rated materials like asphalt shingles, metal, or tile. Keep your gutters free of leaves and pine needles, which act as kindling. You can also install metal gutter guards to prevent debris buildup. Other important upgrades include covering attic and foundation vents with 1/8-inch metal mesh to block embers and ensuring your windows are double-paned for better resistance to radiant heat. Choosing fire-resistant building materials is a proactive investment in your family’s safety.
Don't Forget Regular Maintenance
A fire-resistant home isn't a one-and-done project; it requires ongoing upkeep to remain effective. Seasonal maintenance is your best tool for keeping your defenses strong. Walk your property regularly to clear away dead leaves, branches, and other flammable debris that has accumulated. Check your vents to ensure the mesh screens are intact and clear. Inspect your roof and gutters after storms to remove any new buildup. This consistent vigilance ensures that the home hardening improvements you’ve invested in can do their job when it matters most. A simple checklist can help you stay on track and turn these crucial tasks into a manageable routine.
Related Articles
- The Ultimate Fire Hardening Home Checklist
- Wildfire Risk Insurance: A Complete Guide
- 7 Fire Resistant Home Improvements for Northern California
Pay Less for Home Insurance
and Avoid Non-Renewal?
Our partner, Five Bays Insurance Agency, offers a free policy checkup that spots hidden discounts to make sure you’re not paying more than you should.
Frequently Asked Questions
I can't afford to do everything at once. What's the most important upgrade to start with? If your budget is limited, focus on the two areas that offer the most protection: your roof and the five-foot zone around your foundation. Your roof is the most vulnerable surface for embers to land, so ensuring it's a Class A fire-rated material is critical. After that, clearing all flammable materials—mulch, plants, firewood—from the area immediately surrounding your home creates a vital buffer. These two steps address the biggest threats and are what insurers look at first.
Will making these upgrades guarantee my insurance won't be canceled? While there are no absolute guarantees in today's challenging insurance market, taking these steps is the single best thing you can do to improve your chances of keeping your coverage. It shows your insurer that you are a proactive partner in managing risk. By hardening your home and creating defensible space, you make your property a much better bet, which is essential when insurers are deciding who to cover.
Does creating defensible space mean I have to remove all the plants and trees around my house? Not at all. Defensible space is about smart landscape management, not creating a barren yard. The goal is to strategically thin vegetation, remove dead or dry material that acts as fuel, and create separation between plants so fire can't easily spread. You can still have a beautiful landscape; it just needs to be lean, clean, and green to be fire-resistant.
How do I properly document my home hardening work for my insurance company? Create a dedicated "home hardening file" for your property. Keep before-and-after photos of every project, along with detailed receipts for materials and invoices from any contractors you hired. This portfolio provides tangible proof of your investment. When you speak with your agent, you can walk them through this file to clearly demonstrate the specific risk-reduction measures you've taken.
Once I've hardened my home, is the work finished? Think of home hardening as an ongoing commitment rather than a one-time project. At least once a year, you should inspect your roof, siding, and vents for any wear and tear. And seasonally, you must clear flammable debris like leaves and pine needles from your gutters and the area around your foundation. This consistent upkeep ensures your home's defenses remain effective year after year.