How and Where to Store Emergency Supplies at Home
Get practical tips on where to store emergency supplies at home, how to organize your kit, and ways to keep your family prepared for any situation.
With the constant threat of wildfires and the chaos of the insurance market, it’s easy to feel like you’ve lost control. But preparing your home and family is one of the most powerful actions you can take. You’ve likely already started, building a kit with the essentials you’d need to evacuate. Now, let’s focus on the final, critical piece of that puzzle: deciding where to store emergency supplies at home. This decision is about more than just convenience. It’s about ensuring your plan works under pressure. A strategically placed kit is an accessible kit, ready the moment you need it. This guide offers practical, no-nonsense advice to help you protect your supplies and your peace of mind.
Key Takeaways
- Your kit's location is as critical as its contents: Store your primary "grab-and-go" kit in a cool, dry spot along your main escape route, and place a smaller backup kit near a secondary exit to ensure you can always access supplies.
- A well-organized kit eliminates panic and saves time: Use clear labels, group similar items, and create an inventory list so you can find exactly what you need in seconds, allowing you to focus on a safe and orderly evacuation.
- Preparedness is a habit, not a one-time task: Your emergency kit requires regular upkeep. Set a calendar reminder to review supplies every six months, replacing expired items and updating personal necessities to keep it reliable and ready for action.
What to Store and How to Store It
Knowing what to pack is the first step, but how you store it is just as critical. An organized, well-protected kit ensures your supplies are ready the moment you need them. When an evacuation order comes, you won’t have time to search for scattered items. Your goal is to create a consolidated, easy-to-access system that removes the guesswork during a high-stress event. This means thinking about not just the items themselves, but the containers that hold them and the documents that can help you recover afterward.
Your Essential Emergency Checklist
An emergency kit is your personal support system, giving you access to food, water, and critical supplies when other resources are unavailable. Start with the basics to cover your immediate needs for several days. Your checklist should include:
- Water: Plan for one gallon of water per person, per day. This covers both drinking and basic sanitation.
- Food: Stock a multi-day supply of non-perishable food for everyone in your household, including pets. Think canned goods, protein bars, and dried fruit.
- Communication & Light: Since power outages are common, include a battery-powered or hand-crank radio to receive weather and emergency updates. Every kit also needs a reliable flashlight with extra batteries.
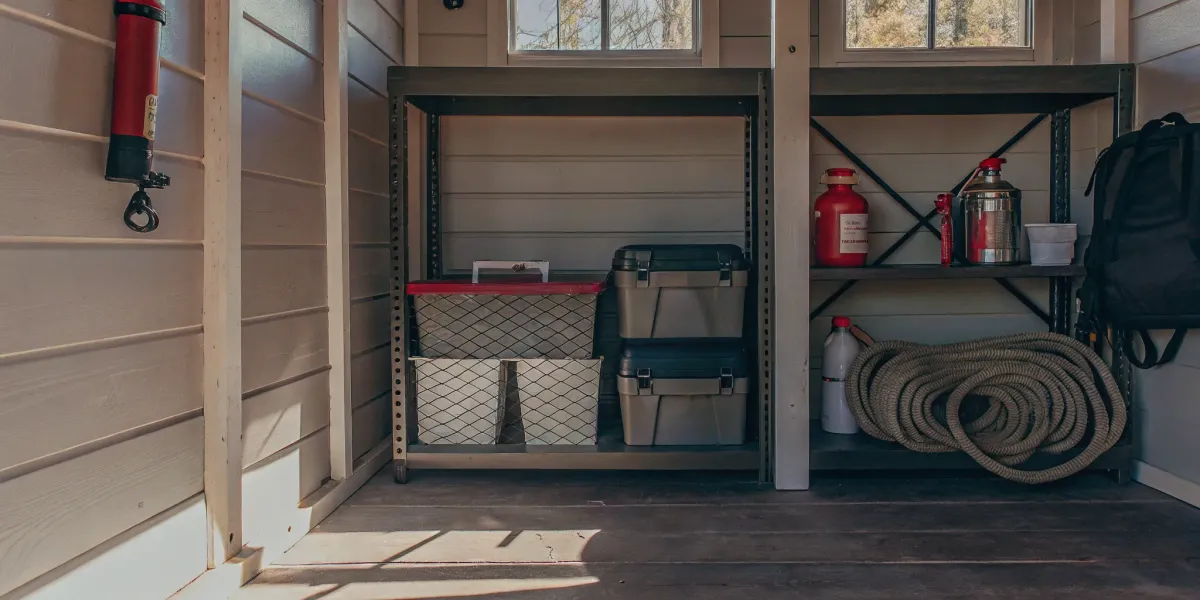
Choose the Right Containers
The right container makes your kit portable and protects your supplies from damage. Don’t just throw items in a cardboard box. Instead, store your supplies in airtight plastic bags and place them inside sturdy, easy-to-carry containers like plastic bins or a duffel bag. This keeps everything organized, dry, and ready to grab in a hurry. If you have a larger family, consider using multiple, smaller containers instead of one large, heavy one. This makes it easier to divide supplies among family members or vehicles if you need to evacuate separately.
Gather Critical Documents and Communication Tools
Beyond food and water, your kit should include copies of essential paperwork that will be vital for recovery. Pack copies of insurance policies, birth certificates, passports, property deeds, and medical records. It’s wise to keep these important papers in a waterproof and fire-resistant case for added protection. Also, include a list of emergency contacts, a local map, and extra sets of house and car keys. These items are often overlooked but are incredibly difficult to replace in the aftermath of a disaster.
Find the Best Storage Spots in Your Home
Where you keep your emergency supplies is just as important as what you put in them. When an evacuation order comes, you won’t have time to hunt through the attic or dig through a cluttered garage. Every second is critical, and your supplies need to be accessible at a moment’s notice. Storing your kit in the wrong place can render it useless—food can spoil in extreme heat, batteries can corrode from moisture, and a kit buried under years of clutter is as good as gone.
The key is to think strategically about placement. Consider your home’s layout, your daily routines, and the most direct paths out of your house. Your goal is to create a system where your supplies are protected from the elements but are ready to go when you are. A well-placed kit is a cornerstone of a solid wildfire action plan, turning your preparation into effective action. By choosing the right spots, you ensure that your investment in preparedness pays off when it matters most.
Identify Your Primary "Grab-and-Go" Location
Your main emergency kit should have a single, designated home that everyone in your household knows. During an emergency, there’s no time for a scavenger hunt. This primary location should be on the path you would most likely take to exit your home. Good options include a front hall closet, a mudroom by the garage door, or a dedicated cabinet in a central living area. The goal is to build a kit with all your essentials and keep it in a known spot so you can grab it quickly and leave without a second thought. Make its location part of your family’s emergency drill so everyone can find it under pressure.
Designate Secondary Access Points
A wildfire can be unpredictable, potentially blocking your main exit with smoke or flames. That’s why having a Plan B for your supplies is so important. A secondary, often smaller, kit stored near an alternate exit can be a true lifesaver. Consider keeping a backpack with core essentials—like water, a first-aid kit, and copies of important documents—in a bedroom with direct outdoor access or near a back door. Having multiple access points to your supplies gives you flexibility and resilience, ensuring you can retrieve what you need even if your primary escape route is compromised.
Account for Climate and Environment
The wrong environment can quickly ruin your emergency supplies. Extreme heat, cold, and moisture are the enemies of preparedness, capable of spoiling food, degrading medications, and corroding batteries. Garages, attics, and outdoor sheds are often poor choices because they experience significant temperature fluctuations. Instead, choose a cool, dry place inside your home with a relatively stable temperature. An interior closet, a pantry, or a storage area under the stairs are much better options. Proper emergency supply storage is essential for keeping your items safe and effective for when you need them.
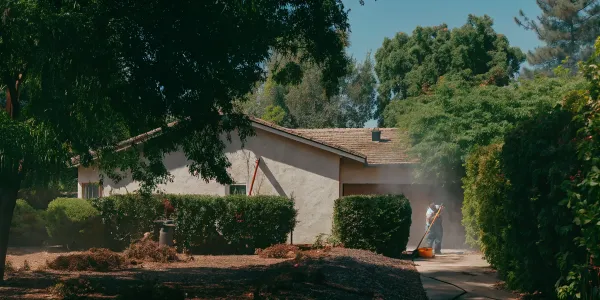
Consider Fire-Resistant Solutions
For those of us living in high-risk fire zones, thinking about how to protect our supplies from fire itself is a critical step. While nothing is completely fireproof, you can improve your kit’s chances of survival. Storing items in a metal cabinet or a fire-resistant container can add a layer of protection. Even more important is the location. Your home’s defensible space—the cleared area around your property—acts as a vital barrier against flames. Storing your kit within this protected zone, away from flammable vegetation and debris, gives it a much better chance of making it through a fire event.
Organize Your Supplies for Quick Access
Having emergency supplies is the first step, but how you organize them can make all the difference when seconds count. A jumbled box of supplies is hard to use and can cause dangerous delays during an evacuation. The goal is to create a system that’s so simple and clear, you could navigate it in the dark or under extreme stress. When you're told to leave your home, you won't have time to search for batteries or sort through canned goods. A well-organized kit removes that friction, allowing you to focus on getting your family to safety. By thinking through placement, packing, and labeling now, you ensure your kit is a reliable tool for your family’s safety. This level of preparation is a core part of any effective wildfire action plan. It's not just about having the right items; it's about being able to find them instantly. A thoughtfully arranged kit can reduce panic and improve your ability to respond calmly and effectively. Let's break down the four key steps to getting your supplies organized for quick and easy access, turning a pile of gear into a functional, life-saving resource.
Select and Label Every Container
In a chaotic moment, you don’t want to waste time figuring out which bag belongs to whom. Pack items for each family member into separate bags, and don't forget one for pets. Label each container clearly with the person's name using a permanent marker or a durable luggage tag. This simple step ensures everyone can grab their own supplies quickly and know where to find personal items like medications. Clear labeling eliminates guesswork and helps keep your evacuation orderly and efficient, which is exactly what you need in an emergency.
Create a Simple Inventory System
An inventory list is your kit’s table of contents. Write down every item you have, noting quantities and expiration dates for food, water, and medicine. This list helps you see what needs replacing before it becomes a problem. Keep a waterproof copy inside your kit and a digital version on your phone or in a cloud drive. Reviewing this list every six months makes restocking simple and ensures your supplies are always ready when you need them. A complete emergency supply checklist can help you get started and make sure you haven't missed anything critical for your family's needs.
Use Space-Saving Packing Techniques
Your emergency kit needs to be portable, so every inch counts. Store smaller items in airtight plastic bags to protect them from moisture and group them by category—for example, all first-aid supplies in one bag, and all hygiene items in another. Remove products from bulky original packaging when possible. Instead of folding clothes, roll them tightly to save space. Pack everything snugly into a durable duffel bag, backpack, or a plastic bin with a secure lid. These techniques make your kit more compact and lighter, which is critical if you need to leave on foot.
Plan for Easy Accessibility
The best emergency kit is useless if you can’t get to it quickly. Choose a storage spot that is safe, cool, dark, and easy to access. A hall closet near your main exit or a designated shelf in the garage are excellent choices. Avoid burying your kit in the back of a cluttered attic or a basement that could flood. Everyone in your household should know exactly where the supplies are located and be able to get to them without help. Making accessibility a priority is a fundamental part of your family's emergency preparedness, ensuring you can grab your kit and go without hesitation.
Tailor Your Storage to Your Home Type
The best place to store your emergency supplies depends entirely on your home. A strategy for a large house won’t work for a small apartment, so let’s find the right approach for your specific living situation. Your goal is to make your kits easy to grab when every second counts, no matter where you live.
Smart Strategies for Apartments
In an apartment or condo, your primary focus should be immediate accessibility. Think about your main exit path and place your kit somewhere along it. A front hall closet, a sturdy bin near the door, or even under a bed in the room closest to the entrance are all excellent choices. The key is ensuring you can get to your supplies quickly, even if debris or damage blocks other parts of your home. You need a plan that works when your main doors might be obstructed. Consider keeping a smaller, secondary kit on a patio or balcony if you have one, giving you another option in a complex emergency.
Top Options for Single-Family Homes
If you live in a single-family home, you have more flexibility. A designated shelf in the garage or a large closet near a main exit are classic, effective options. You can also think outside the house itself. Storing a kit in a sealed, waterproof container under a deck or along a clear path in your side yard keeps it out of the way but accessible if you need to evacuate quickly. This strategy works especially well for wildfire preparedness, as it allows you to grab your supplies as you move away from the structure and toward safety. Just be sure the container is durable and protects the contents from weather and pests.
Creative Solutions for Small Spaces
Living in a small home or condo doesn’t mean you have to compromise on preparedness. You just need to get creative with your space. Look for storage opportunities in plain sight, like a decorative storage ottoman that can hold supplies. Slim, rolling containers that slide under a bed or couch are perfect for storing kits without taking up closet space. If you have limited closets, you might need to store your supplies in organized, clearly labeled stacks against a wall. Using vertical space with sturdy shelving can also help you organize your supplies without creating clutter.
How to Use Garages and Sheds Safely
Garages and sheds are practical spots for emergency kits, but they come with a few warnings. It’s critical to choose a dry place with steady temperatures to prevent items from spoiling. Extreme heat in a garage or shed can degrade food, water, and medical supplies over time. To be safe, place everything in airtight, waterproof containers and store them on shelves off the ground to protect against moisture and pests. Most importantly, make sure the location is on your way out during an evacuation. You don’t want to run back into a dangerous area because you forgot your kit. Having smaller kits in your car and at work is also a smart backup.
Protect and Maintain Your Emergency Kit
Building your emergency kit is a huge first step, but the work doesn’t stop there. A kit full of expired food, dead batteries, or leaky water bottles won’t do you any good when you need it most. Proper storage and regular maintenance are what keep your supplies reliable and ready for action. Think of it as protecting your investment in your family’s safety. A well-maintained kit is a cornerstone of a solid emergency plan, ensuring that when the time comes to evacuate, you can grab your supplies with confidence, knowing everything inside is safe, effective, and ready to use. This ongoing process turns a simple box of supplies into a dynamic tool that adapts to your family's needs and the changing seasons. It's about creating a system you can trust implicitly, removing one major source of stress during a high-stakes situation. Taking the time to protect your kit from the elements, pests, and the simple passage of time is just as important as choosing the right items to put inside it in the first place. It’s the difference between having supplies and having a solution.
Control for Temperature and Moisture
Extreme temperatures and humidity are the enemies of your emergency supplies. Heat can spoil food and medication, degrade plastic water bottles, and shorten the life of batteries. Moisture can lead to mold, rust, and ruined electronics. To prevent this, choose a dry place with steady temperatures to store your kit. An interior closet, a pantry, or a space under a bed are often better choices than a garage, attic, or shed, which can experience dramatic temperature swings. Keeping your supplies in a climate-controlled environment is one of the simplest ways to ensure they remain effective for as long as possible.
Safeguard Against Pests and Damage
Nothing will ruin an emergency food supply faster than pests. Rodents and insects can chew through cardboard and thin plastic, contaminating your food and water. To protect your kit, store your items in airtight plastic bags and place them inside sturdy, easy-to-carry containers like heavy-duty plastic bins with secure lids. This creates multiple barriers against pests and also protects your supplies from water damage or being crushed. A durable container ensures that when you grab your kit in a hurry, its contents are intact and safe to use, giving you one less thing to worry about during an emergency.
Keep Your Supplies Secure
A secure kit is an accessible kit. It’s not enough to just have emergency supplies; you also need to keep them organized and stored correctly so you can find them instantly. Your primary "grab-and-go" kit should be in a location that is unobstructed and known to everyone in your household. Avoid burying it in the back of a cluttered garage or at the bottom of a closet piled high with other belongings. Keeping the path to your kit clear and ensuring it’s easy to lift and carry is a critical part of your preparedness strategy. Security means knowing exactly where your supplies are and being able to get to them without delay.
Set a Regular Maintenance Schedule
Your emergency kit is not a "set it and forget it" project. Your family’s needs change, and supplies expire. The best way to stay prepared is to check your kit regularly and replace any items that have passed their expiration date. A good rule of thumb is to review your kit every six months. Set a recurring reminder on your calendar—perhaps when you change the clocks or test your smoke alarms. During your review, swap out expired food and water, test batteries, and update supplies based on your family's current needs, like new medications or clothes for growing children. This simple habit is a key part of your overall Wildfire Action Plan, ensuring your kit is always up-to-date.
Avoid These Common Storage Mistakes
Putting together an emergency kit is a huge step toward protecting your family. But your work isn’t done once you’ve gathered the supplies. Where and how you store your kit can make the difference between a smooth evacuation and a frantic search during a high-stress emergency. Many people make simple mistakes that can render their preparations useless when it matters most. Avoiding these common pitfalls is just as important as building the kit itself. Let’s walk through the four biggest storage traps and how you can easily sidestep them to ensure your supplies are ready when you are.
Picking an Inaccessible Location
When an evacuation order is issued, you may only have minutes to leave. If your emergency kit is buried in the back of a cluttered garage, tucked away in a hard-to-reach attic, or stored in a basement with a blocked exit, it might as well not exist. You need to be able to grab your supplies and go without delay. The best spot is near your most-used exit, like a front hall closet or in your mudroom. Some families even keep a kit in their car. Think about your primary evacuation route and place your kit somewhere along that path. The goal is zero friction—you should be able to access your supplies instantly, even in the dark or under duress.
Forgetting to Organize and Label
Having a giant, unlabeled bin of supplies can create chaos during an emergency. Fumbling for batteries, a first-aid kit, or a specific medication wastes precious time and adds to an already stressful situation. A well-organized kit is a functional kit. Start by grouping similar items together in clear, resealable bags. Use a permanent marker to label everything clearly. It’s also a great idea to pack smaller, personalized bags for each family member and pet. This makes it easy to distribute items and ensures everyone has what they need. An organized kit lets you think less and act faster, which is exactly what you need when every second counts.
Overlooking Environmental Risks
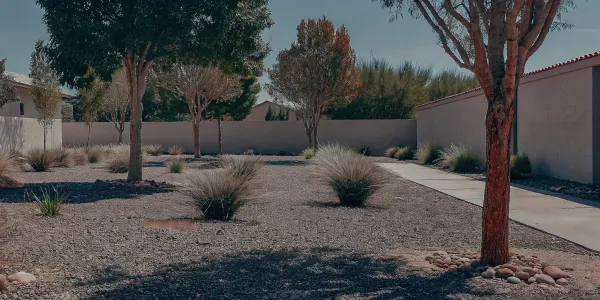
Where you store your supplies can directly impact your home’s vulnerability to wildfire. A common mistake is storing emergency kits or other flammable materials in sheds or right up against the house. These locations are often the first to ignite from flying embers. Creating what fire officials call defensible space is critical; this means moving flammable items like firewood piles, propane tanks, and gas cans at least 30 feet away from all structures. Your emergency kit should be stored inside your home, away from windows, in a location that is less exposed to immediate fire danger. Don’t let your preparedness efforts accidentally increase your risk.
The "Set It and Forget It" Trap
Building an emergency kit is not a one-time task. The most common mistake is assembling a kit and then forgetting about it for years. Over time, food and water expire, batteries lose their charge, medications become outdated, and your family’s needs change. A kit with expired food and dead flashlight batteries is not a reliable safety net. To avoid this, set a recurring reminder on your calendar to review your supplies every six months. Check expiration dates, test electronics, and update personal items like clothing and important documents. This simple habit ensures your kit is always ready and reliable, forming a key part of your overall Wildfire Action Plan.
Create Your Emergency Storage Plan
Having the right supplies is only half the battle. Without a clear plan for where to store them and how to access them, even the best-stocked kit can fail you in a crisis. A storage plan turns a pile of gear into a functional system your entire household can rely on when seconds count. It’s about creating order before chaos hits. By thinking through a few key steps, you can build a reliable plan that integrates into your home, giving you confidence that you’re ready for what comes next.
Assess Your Available Space
First, take a realistic look at your home. Walk through each room and identify potential storage spots that are cool, dry, and out of the way of daily traffic—think closets, under beds, or sturdy shelves in the garage. The goal isn't to find one giant space but several logical ones. It's crucial to not just have emergency supplies, but to keep them organized and stored correctly. Consider the weight of items like water and canned food; they need to be on lower shelves or in sturdy containers on the floor. This quick assessment prevents you from creating a cluttered, inaccessible pile.
Make Sure Everyone Knows the Plan
Your emergency plan is only effective if everyone in your household understands it. Once you’ve organized your supplies, walk through the plan with your family. Show them where the main "grab-and-go" kits are and what’s inside. A great way to do this is to pack items for each family member into separate, clearly labeled bags so everyone can find their personal supplies quickly. This isn't about creating fear; it's about building confidence and muscle memory. When everyone knows their role and where to find their gear, you create a calm, coordinated response instead of a panicked scramble.
Map Out Your Storage Locations
Every home needs a primary storage spot for the main emergency kit, and it should be somewhere you can get to without obstruction. Choose a location near the exit you’re most likely to use during an evacuation, like a hall closet near the front door or garage. But don’t stop there. Your main exit could be blocked in an emergency. Designate at least one secondary location, perhaps near a back door. The key is quick access. Your Wildfire Action Plan should include a simple map of your home showing these locations, so there’s no confusion during a high-stress event.
Schedule Your Six-Month Review
Preparedness is not a one-time task; it requires maintenance. Food expires, batteries lose their charge, and your family’s needs change. Set a recurring reminder on your calendar—once every six months is a good rhythm—to review your emergency kits. During your review, check expiration dates on food, water, and medications, and test your batteries and electronics. Swap out seasonal clothing and update personal documents as needed. This regular check-in ensures your supplies are safe, effective, and ready to go the moment you need them. It’s a small investment of time that pays off with peace of mind.
Related Articles
- The Ultimate Wildfire Emergency Kit Checklist
- Wildfire Car Emergency Kit: The Ultimate Checklist
- Your Essential Fire Emergency Kit Checklist
- How to Pack for a Wildfire Evacuation: A 5-Minute Guide
- How to Build a Wildfire Emergency Kit at Home
Frequently Asked Questions
Is it really okay to store my emergency kit in the garage or an outdoor shed? While it might seem like the most convenient spot, garages and sheds are often poor choices for storing your supplies. The extreme temperature swings can spoil food, ruin medications, and drain batteries much faster than you'd expect. If you have absolutely no other option, you must use heavy-duty, airtight containers to protect everything from moisture and pests. However, a climate-controlled space inside your home, like an interior closet, is always the safer bet.
I live in a small apartment with almost no storage. What are my options? You just have to get a bit more creative with your space. Look for opportunities to store supplies in plain sight, such as inside a decorative storage ottoman or a bench by the door. Slim containers that slide under a bed or couch are also excellent for keeping a kit accessible but out of the way. The most important thing is to keep your primary kit near your main exit, ensuring you can grab it without having to move furniture or dig through a closet.
How often should I actually check and update my kit? Think of your kit as a living system, not a one-time project. You should review all your supplies at least every six months. A great way to remember is to tie it to another routine, like when you change your clocks for daylight saving time or test your smoke alarm batteries. During your check-in, swap out any food, water, or medications that are near their expiration date, test your electronics, and update personal items to reflect your family's current needs.
What's the point of a secondary kit if I already have a main one? Wildfires are unpredictable, and your primary escape route could easily become blocked by smoke or flames. A secondary kit, even a smaller one, stored near an alternate exit gives you a vital backup plan. It ensures that if you can't get to your main supplies, you can still grab core essentials like water, a first-aid kit, and copies of your documents. Having this flexibility can make a critical difference in a chaotic situation.
Besides food and water, what's the most overlooked item I should have in my kit? Hands down, it's copies of your critical documents. In the aftermath of a disaster, having access to your insurance policies, birth certificates, passports, and property deeds is essential for starting the recovery process. Keep physical copies in a waterproof and fire-resistant bag within your kit, and also have digital backups stored securely in the cloud. These documents are incredibly difficult to replace and will save you immense stress later on.